

Adobe Audition for Radio
- Apr 11, 2016
- 2 min read
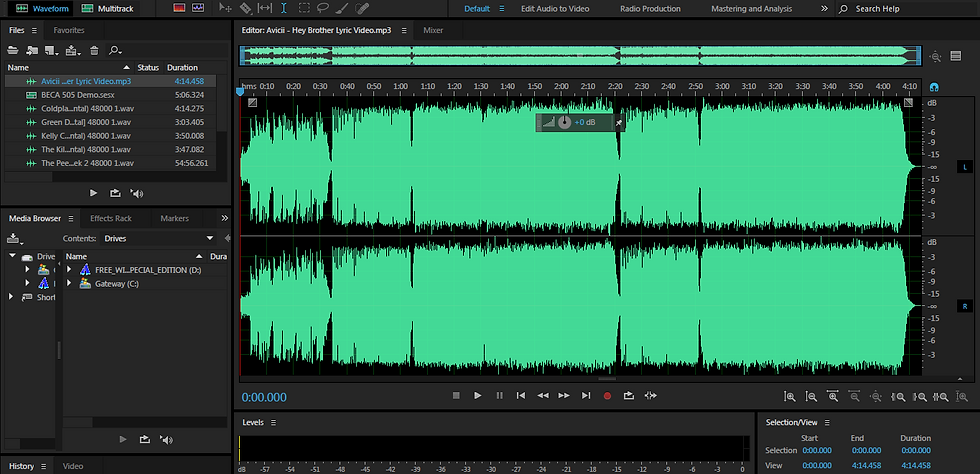
Step 1: Select which audio track you want to edit by selecting "Insert File" on the second icon underneath File. A visual of the wave form will appear in stereo form (left and right signal). The size of the wave tells how loud the file is.
Step 2: Create a Multitrack session and include the tracks you want to include. Right click the audio file underneath Name and select "Insert into Multitrack."
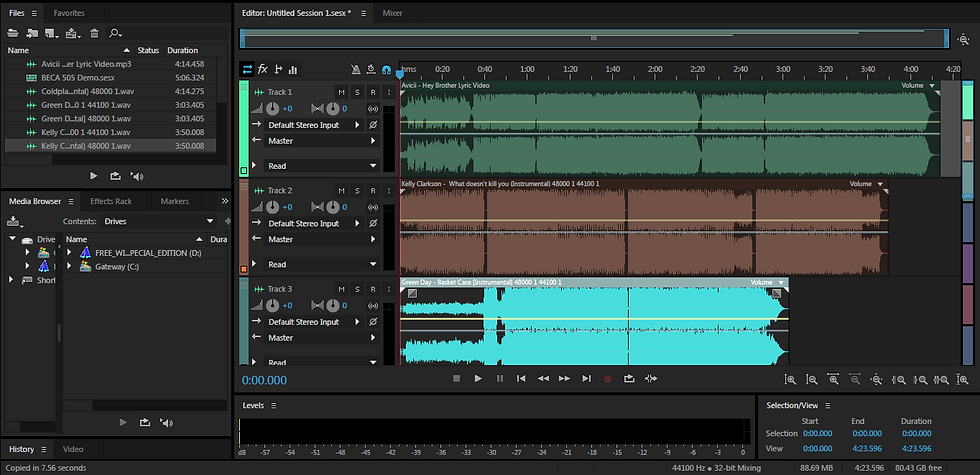
Step 3: After selecting your audio files they will appear in one session in different track sessions. They are color coordinated to differentiate the audio tracks.

Step 4: Next you can use the razor tool found at the top bar to cut different parts of the audio wave that you want to use.

Step 5: After selecting which areas of the audio wave you want to use, select the Move Tool (next to the razor tool) to grab the piece and move alongside one another.

Step 6: You will notice that the audio waves all become the same color since they are in the same track. Also, when you place waves over one another they "Cross Fade." This means that the first audio wave will decrease in volume will the other increase to create a smooth transition from one sound to another. "Fading" can also be done to the beginning or end of track to start or end slowly or fast.
Step 7: The white line in the middle of the audio wave controls the volume. It can be raised up to increase volume or lowered to decrease it.

Step 8: To include other effects, such as EQ, compression, or reverb, you can slect Effect in the upper bar. If not and you're satisfied with your sound then select "File," then "Export," and "Select Multirack Mixdown" and "Entire Session" to create your new project in some audio form.


Comments